How to Use Green Screen
What you will need
- Green screen kit
- iPad with iMovie installed
The first tutorial on this page is an introduction to the basics of how to use the green screen feature in iMovie for iPad. It’s a great general overview.
If you’ve never used the green screen feature before, you may want to check this one out first.
The second tutorial is specifically about how to use the green screen feature to clone a subject multiple times–for example, how to make multiple versions of the same person appear all at once.
Step by Step Multi-Clone…
1
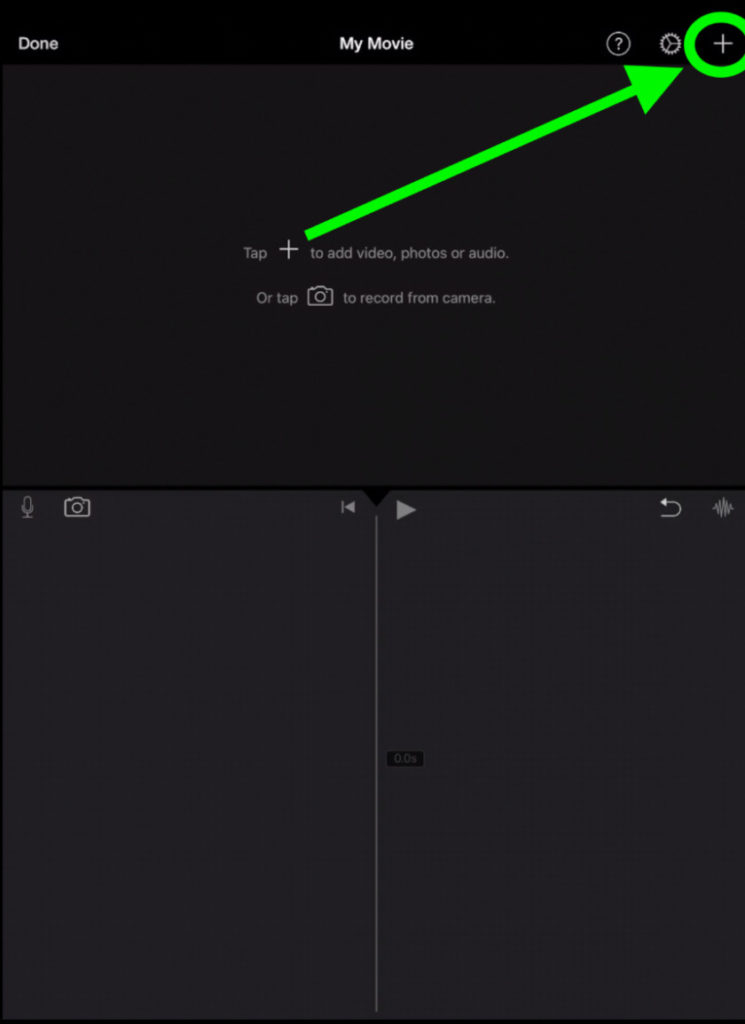
From the media folder, find your background photo or video, tap to highlight, and add it to the editing timeline by tapping the plus sign (+)

2
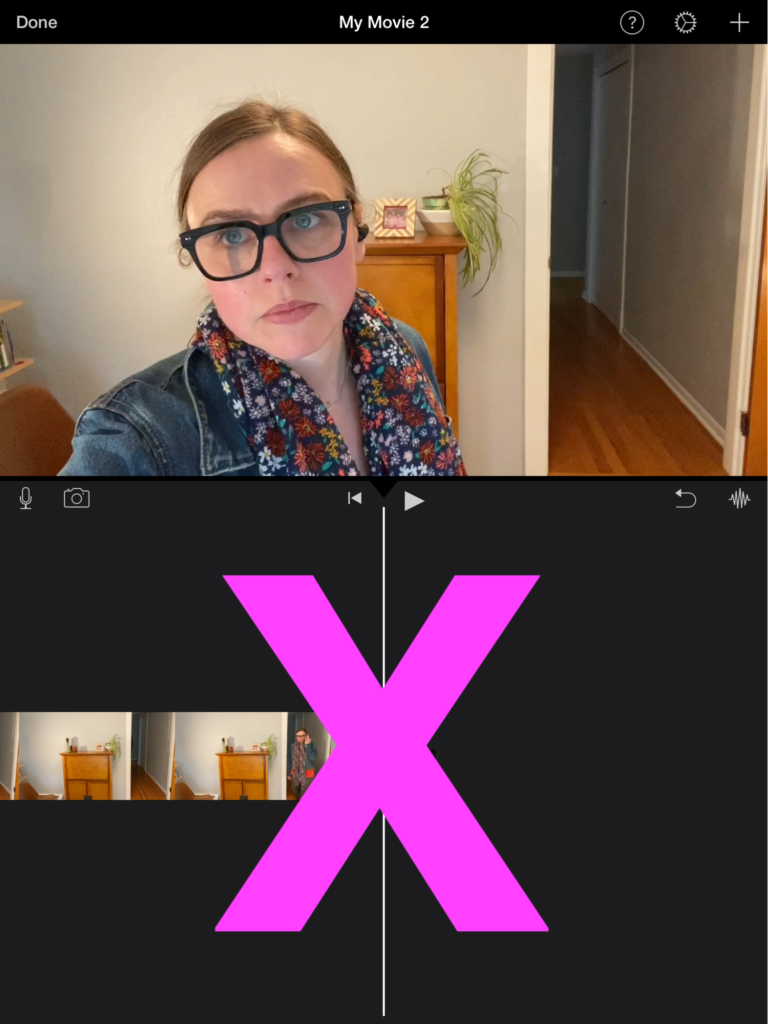
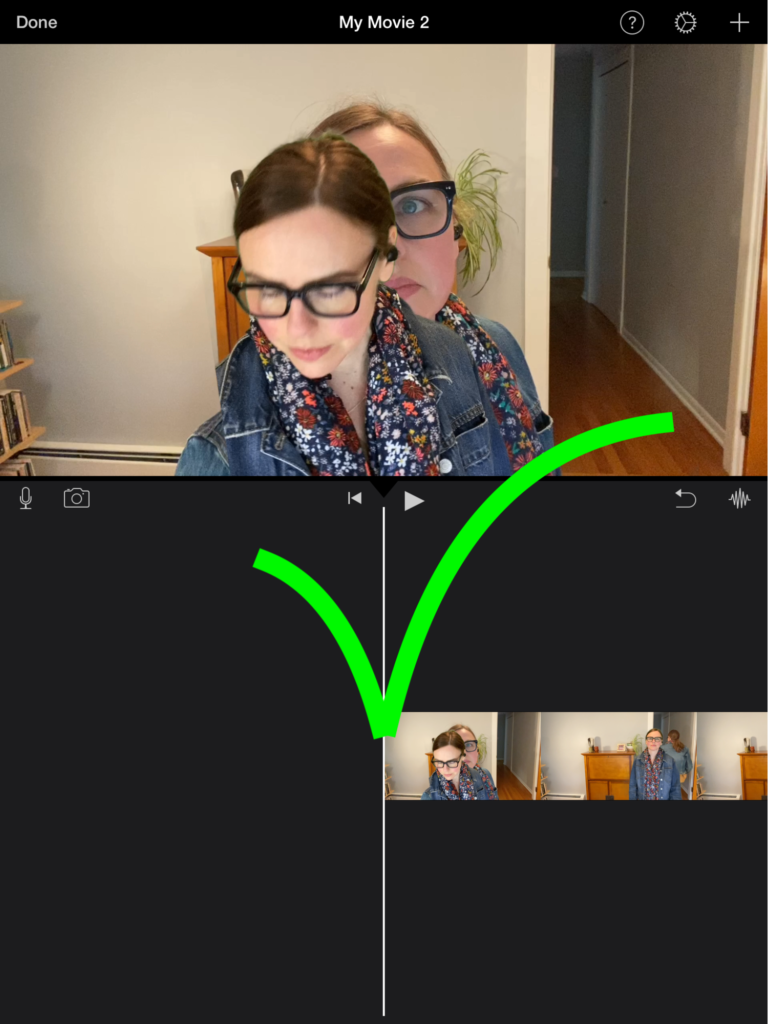
Position the playhead at the beginning of your clip.
3
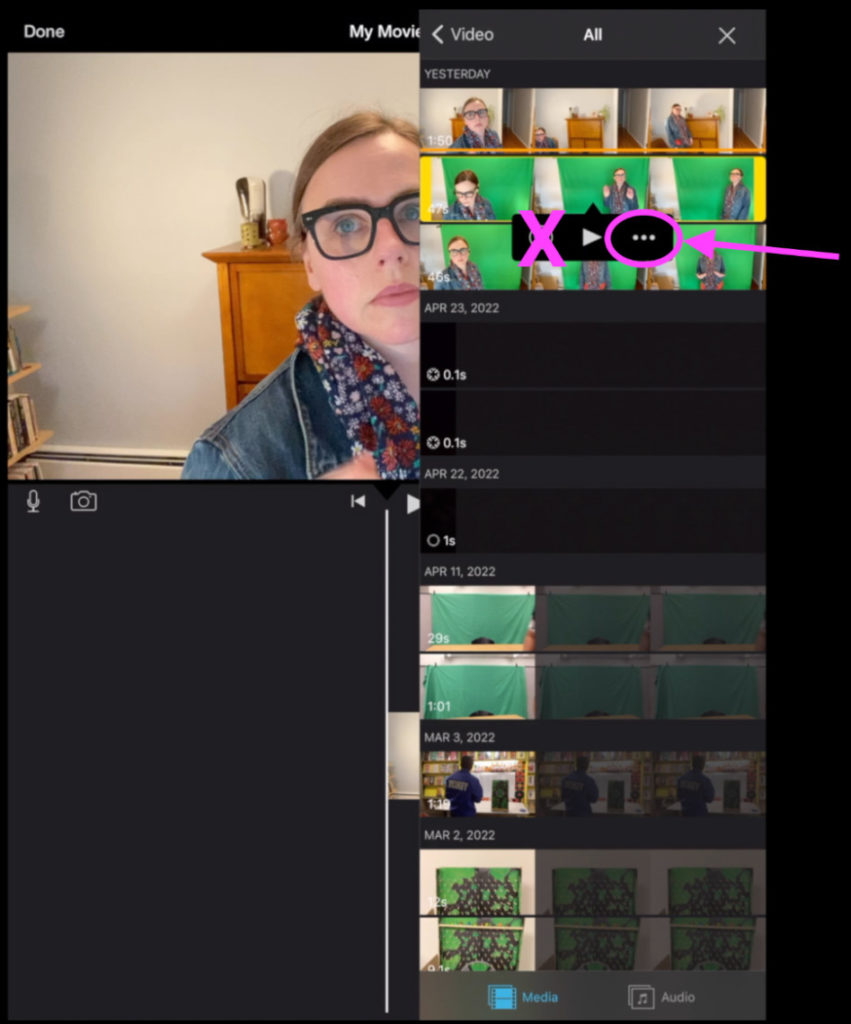
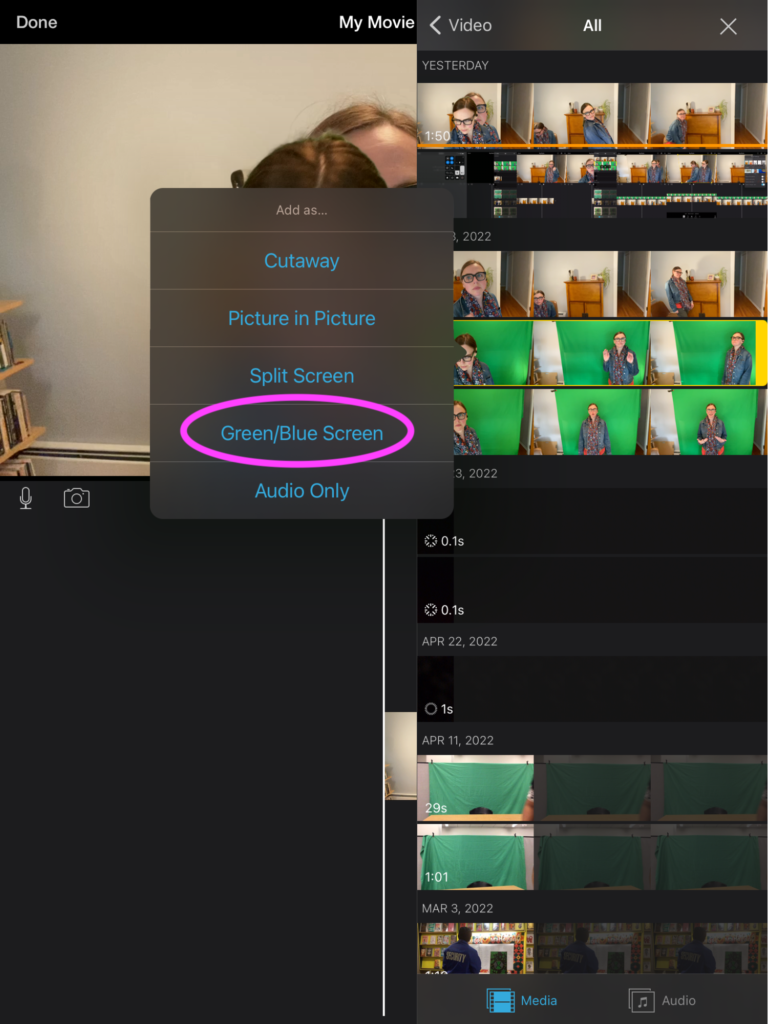
From the video folder, highlight your green screen video and layer it on top of your background image or video by tapping the three dots … and selecting Green / Blue Screen
4
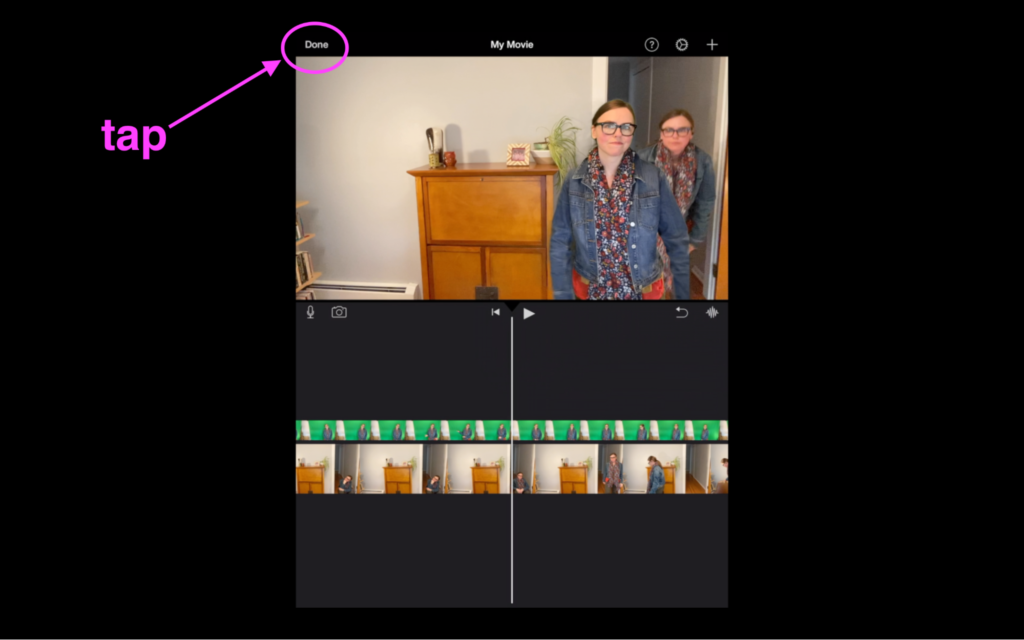
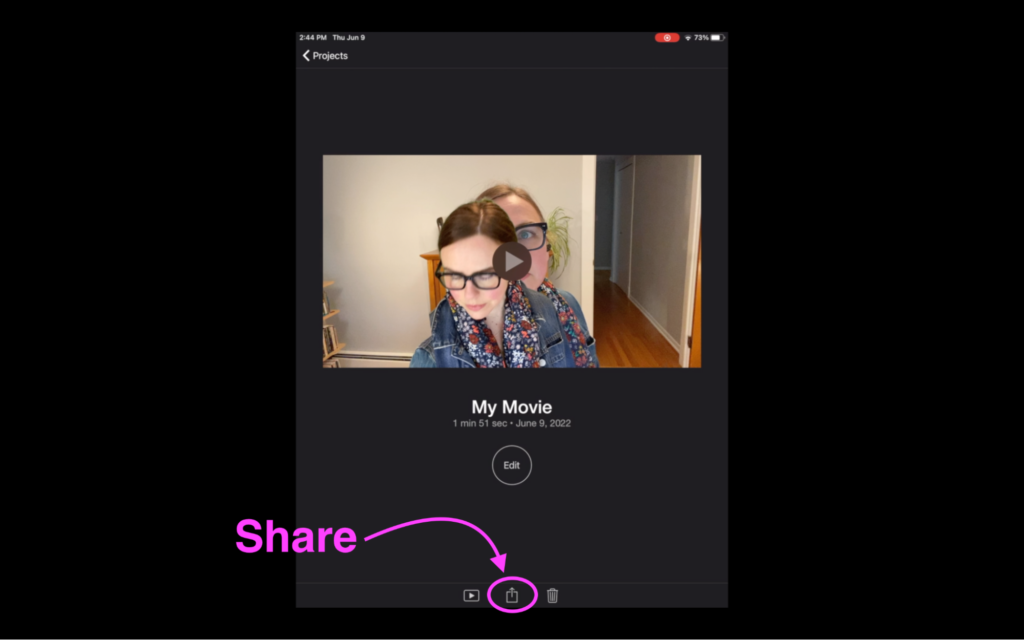
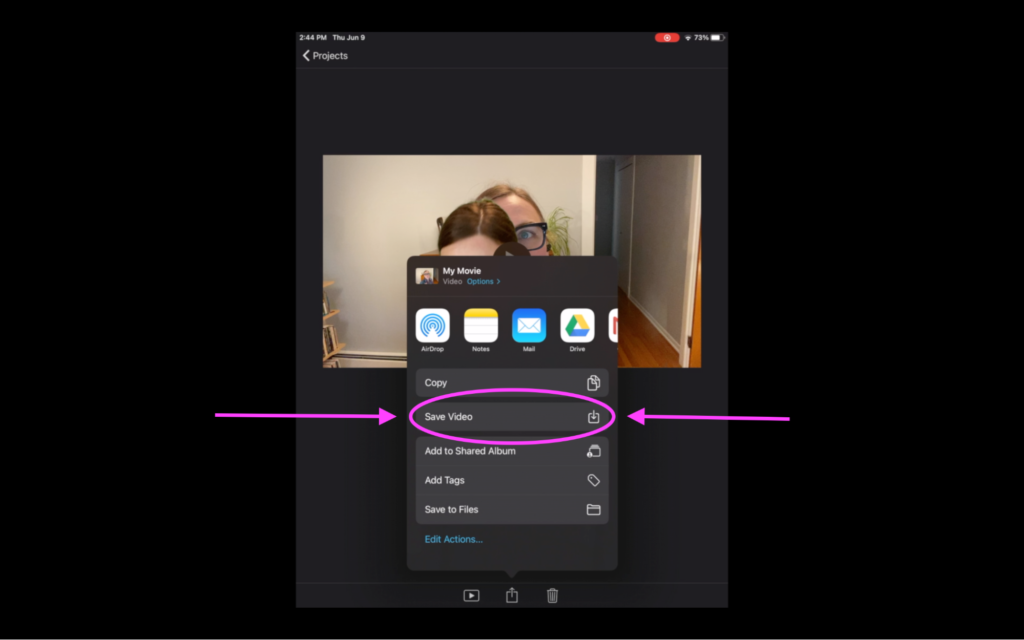
When you are finished editing / cleaning up your green screen layer, tap “Done” and then tap the “Share” icon and then “Save Video” to export your video. (This will take a moment.)
5
In your iMovie Projects folder, tap the plus sign to create a new movie.

6
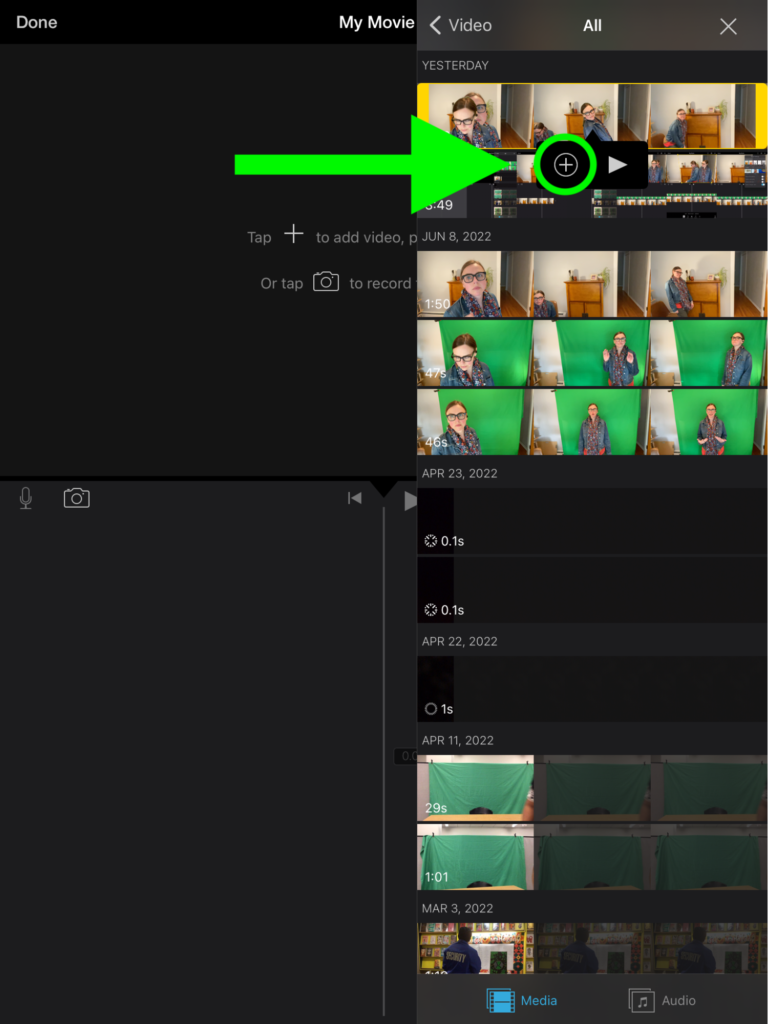
From the media folder select the video that you just exported and add it to your timeline as your new background layer.
7
Now you can layer in a second green screen video, and edit.


You can repeat the process of creating a new background layer (“Done” and then “Share” and then “Save Video” to export), to add as many green screen layers to your movie as you’d like!